How to Use St Patrick’s Day Brushstroke Lucky PNG Like a Pro
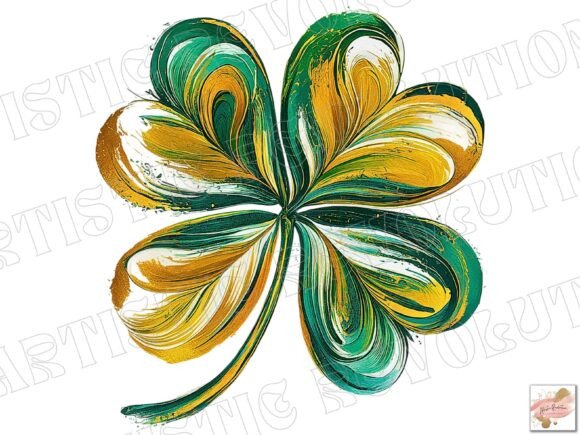
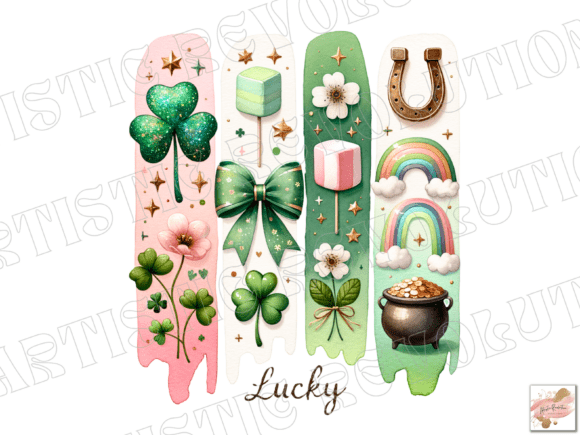
If you’ve searched for St Patrick’s Day graphics recently, you’ve likely come across a style that combines a painted brushstroke look with the word “Lucky” (or similar phrases) saved as a PNG file. A St Patrick’s Day Brushstroke Lucky PNG is basically a transparent image that mimics the texture of a hand-painted brushstroke, with a festive message or symbol. It’s popular among creators, small business owners, and marketers because it adds an organic, handmade feel to digital designs without requiring actual painting skills.
But the simplicity of a file that’s “already done” can be deceptive. Many people grab the first free PNG they see, throw it into a flyer or social post, and later discover blurry edges, mismatched colors, or a file that simply doesn’t print well. This article walks through the most common mistakes I see people make with these brushstroke PNGs—and how to avoid them. Whether you’re a beginner making your first holiday promotion or a seasoned designer, paying attention to a few key details will save you time and frustration.
Mistake #1: Choosing a PNG with Poor Resolution or Wrong Dimensions
One of the biggest misconceptions is that any PNG file from a free download site will work everywhere. A St Patrick’s Day Brushstroke Lucky PNG that looks crisp on your screen at 150 pixels wide will turn into a pixelated mess when you try to use it as a Facebook cover or print it at 8x10 inches. The brushstroke texture relies on smooth curves and subtle transparency; low resolution destroys that artistic effect.
What to check before you download:
- Dimensions – For social media, aim for at least 1000x1000 pixels. For print, you need 300 DPI. If the listing says “300 dpi” but the pixel dimensions are tiny (like 300x300), that file is actually only 1 inch when printed. Look for a size that matches your intended output.
- Resolution – Many free sites list “high resolution” but it’s relative. If you plan to resize it larger than the original, the brushstroke will become jagged.
- File size – A very small file (under 100 KB) for a large-looking image is a red flag. It usually means the file is compressed too much for a brushstroke edge to remain clean.
Better approach: If you need a large format for a banner or print, either buy a high-resolution version from a trusted marketplace (like Creative Market or Etsy with clear specs) or use a vector-based alternative. Some designers offer the same brushstroke art as an SVG or EPS, which scales infinitely.
Mistake #2: Ignoring the PNG’s Background and Transparency Quality
The whole point of using a St Patrick’s Day Brushstroke Lucky PNG is that it should have a transparent background, so you can place it over any color or image. But not all transparency is equal. I’ve seen plenty of “transparent PNGs” that still have a faint white halo around the brushstroke—usually from poor cropping or incorrect export settings.
That halo becomes painfully obvious when you put the design over a dark green or black background. The brushstroke, which is supposed to look painted directly onto the background, ends up looking like a sticker with a white edge.
How to avoid surprises:
- Always preview the PNG over a dark background and a light background before using it. Many design tools (Photoshop, Canva, Procreate) let you add a temporary background layer.
- Check the edges: zoom in to 200-400% and look for any leftover pixels from the original background.
- If you see a white or gray rim, you may be able to remove it with a “remove background” tool or by using a layer blending mode like Multiply. But it’s better to start with a clean file.
Also watch out for PNGs that come with a black background “preview” but claim it’s transparent. The seller may have placed it on a dark background for display, but the actual file has no transparency at all. Always download a sample or read the product description carefully.
Mistake #3: Not Matching the Brushstroke Style to Your Project’s Aesthetic
A brushstroke design has a distinct personality. Some are thick and messy, with paint splatters; others are sleek calligraphy-style strokes. A St Patrick’s Day Brushstroke Lucky PNG might come in several color variations: greens, golds, whites, and orange accents. The mistake is picking one solely because it’s free or trendy, without considering whether it fits the mood of your brand or event.
For example, if you’re creating a professional St. Patrick’s Day email header for a law firm or bank, a rough, distressed brushstroke with heavy splatters might feel too casual. Conversely, a very elegant, thin brushstroke won’t stand out on a busy Instagram story.
Better choices:
- Look for a PNG that uses the same “brush” style throughout a set—not a mix of different brush textures that clash.
- Pay attention to the color palette. “Green” isn’t just green. A bright neon green will look different than an emerald or olive tone. Choose a green that harmonizes with your other design elements.
- If the word “Lucky” is in the brushstroke, check the font style. A rough brushstroke paired with a formal serif font feels mismatched. Many artists now include both the brushstroke background and a separate text layer if you want to customize the word.
Mistake #4: Overlooking Licensing and Commercial Use Restrictions
Many free St Patrick’s Day Brushstroke Lucky PNG files come from hobbyist designers or sites with vague licenses. “Free for personal use” means you can put it on your friend’s birthday card but not use it on a product you sell, in a paid ad, or on a website that earns money. Small business owners often assume that if it’s available for download, it’s okay to use commercially. That assumption can lead to takedown notices or even legal fees.
What to verify:
- Explicit commercial license – The product page should state “commercial use allowed” or include a license file. Some creators require attribution; others don't. Read the fine print.
- Number of uses or impressions – Some premium licenses limit the number of copies you can print or the number of website visitors. For a small business making 100 mugs, that’s usually fine. But if you’re a large corporation, you may need an extended license.
- Editable vs. non-editable – Even within a license, you may be allowed to resize but not recolor. Confirm if you can change the color of the brushstroke or add new elements on top.
When in doubt, buy from a reputable platform like Envato Elements, Creative Market, or a designer you trust. The cost is typically a few dollars, and it saves you from using an unlicensed asset.
Mistake #5: Forgetting How Brushstroke PNGs Behave in Different Software
A St Patrick’s Day Brushstroke Lucky PNG is a raster image (pixels). That matters when you open it in a vector-based app like Adobe Illustrator or CorelDRAW. Some users import a PNG and try to scale it up dramatically, expecting it to stay sharp. It won’t. Similarly, if you open a 72 DPI PNG in a high-resolution Photoshop document meant for print, the brushstroke will look small and may print poorly.
Advice for different workflows:
- For print projects (brochures, flyers, posters): Import the PNG at 100% size in a 300 DPI document. Do not scale it up. If you need a larger version, go back to the source and download a bigger file.
- For web and social media: 72 DPI is standard, but ensure the pixel dimensions match your canvas (e.g., 1080x1080 for Instagram). You can scale down easily; scaling up is risky.
- For layered designs: Use software that supports PNG transparency (Canva, Photoshop, Procreate, Affinity). If you’re using a basic tool like MS Word or Google Slides, be aware that some versions handle transparency poorly—you may see a white box behind the brushstroke. Test it in the app before finalizing.
- Coloring issues: If you want to change the color of a brushstroke PNG, you can’t simply “recolor” a PNG like a vector. You’d need to use blending modes (multiply for dark strokes on light backgrounds) or apply a color overlay if the brushstroke is in a single color on a transparent background. Some designers sell “colorable” PNGs where the brushstroke is grayscale, making it easier to tint. Look for that feature if you want flexibility.
Mistake #6: Using a Brushstroke PNG That’s Too Busy for Your Message
The word “Lucky” is often integrated directly into the brushstroke in many St Patrick’s Day Brushstroke Lucky PNG designs. The brushstroke itself may contain multiple colors, splatters, and overlapping strokes. It can be visually overwhelming when paired with other text or graphics. A common mistake is to place a busy brushstroke PNG onto an already crowded flyer, making the message hard to read.
Tip: Use the brushstroke as a focal point, not a background. Give it plenty of negative space around it. If the brushstroke includes the text, avoid adding extra text near it—let the “Lucky” stand out. Alternatively, choose a simpler brushstroke (a single solid green stroke) and add a clean sans-serif text over it for contrast.
For example, if you’re designing a social media post for a St. Patrick’s Day sale, you might pair a bold green brushstroke with the word “Lucky” right in the middle, with small details like “50% off” placed in a white box at the bottom, not overlapping the brushstroke. The brain should be able to process the graphic in under three seconds.
Mistake #7: Not Testing the PNG on Different Backgrounds Before Publishing
This is perhaps the most overlooked step. A St Patrick’s Day Brushstroke Lucky PNG that looks perfect on a white screen may vanish on a light green background, or the green stroke may blend into a dark background. Because brushstrokes often have semi-transparent edges or subtle gradients, they interact with backgrounds in unexpected ways.
I always recommend downloading a test image and placing it on at least three backgrounds: white, dark gray, and a photo you might use. Change the opacity? Does the brushstroke hold up? Are the edges still clear? For print, do a small test print on the actual paper stock you plan to use—some printers drop the lighter tones of a brushstroke, making it look faint.
Quick checklist:
- Check contrast: the “Lucky” text (if present) should be readable from a distance. Greens often lack contrast on green backgrounds.
- Check transparency halo: as mentioned earlier, a white rim kills the painted look.
- Check blending: If you use a multiply blend mode, does the brushstroke interact nicely or become too dark?
Final Practical Advice for Choosing and Using a St Patrick’s Day Brushstroke Lucky PNG
Start by defining your use case: web, print, or merchandise? That dictates resolution and file format. Then search specifically for “high resolution brushstroke lucky PNG commercial use” on trusted platforms. Read the description carefully—look for dimensions, DPI, transparency confirmation, and license terms. If you find a PNG you love that’s only available at 500x500 pixels, either plan to use it only for small thumbnails or look for a vector version.
When you download, organize the file with a clear name and keep the license file accessible. If you ever need to prove the right to use it, you’ll be glad you did. Finally, before putting it into your final design, test it on multiple backgrounds and in your intended software. A few minutes of testing can prevent a design disaster that would require rework under a deadline.
The beauty of a brushstroke PNG is that it gives any project an authentic, handcrafted feel—perfect for St. Patrick’s Day celebrations. By avoiding these common pitfalls, you’ll maintain that charm while ensuring your design looks professional and intentional, whether you’re promoting a pub crawl, creating a family dinner invitation, or branding a limited-time offer for your customers.